Ella-isms vol 4

I know these posts don't serve as much except a memory for me and entertainment for grandparents, but here are some recent Ella-isms.


"Mum can you draw a big volcano, and some skeletons and persons in the lava? Not me or you or daddy or Josh.... just some Australian people."

Calum: And then the shell sucks in the nutrients from the water and poos it out from it's bum.
Ella: Oh daddy. You are a silly man. 

Getting into the car one morning after Calum had driven it the night before "I can smell Daddy's dog-farts."

Ella talking to me about Calum "He calls himself a big daddy bear... because on his chest he has fur."

Asked loudly in Kmart while I'm browsing the shelves: "Mummy, when I grow up to be a farmer, what will you be? A shopping lady?"

"What about we make lots of necklaces for everyone in the whole world for Christmas Day. Maybe on Friday? Or Tuesday?"

"Daddy needs to go and get his hair cut because it will fill up the whole house."

Grandpa: That's my beard. Does your daddy have a beard?
Ella: No, my daddy has stubble.

Me: oh my goodness there are so many crumbs! How did you do that?
Ella: I was eating, and then some crumbs came along. 

Suddenly while playing with her toy cake mixer "Mum, I love this decision!"

Me: Get ready so we can go
Ella: But MUM! I need to do my incredible things.


You might also be interested in:


Dino Mat - an easy portable play-mat DIY

Easy DIY dinosaur play mat toy

Ever wish you had something to take to the cafe for your preschooler to play with while you sip a latte? UM YES. Like, you don't even know how many little snot-fingers have been all over the grimy old plastic toys that are stuffed in a basket somewhere in the corner of many cafes. Not to mention often these cafe basket toys were donated for good reason - i.e. they are missing parts, don't hold kids attention, etc.

Here's a simple DIY you can put together for playing on the go. I made this for my daughter's birthday and it cost me $1 thanks to my scrap fabric, and the fact that the little plastic dinosaurs came from a damaged package so they were discounted. 

This toy is open-ended, allowing for endless scenarios and habitats. My 4-yr old can go out into the garden and forage for twigs, bark, stones etc to create her own dino habitat for this, which combines fresh air and nature as well as having "ventures" as she calls them, and that makes me happy.

Easy DIY dinosaur play mat toy

Fabric you need:
- Green felt for grass (this is an A4 piece)
- Scraps of blue-ish fabric for pond
- Scrap of sandy coloured felt/fabric for sand/swamp
- 2 types of fabric for the drawstring bag, or one type if you don't want it double-sided (OR use a small bag you already have)
- Ribbon / sewing tape / drawstring for bag chord
- Optional: a smoother fabric for a backing. This is handy as it's easier to brush clean than felt.

Step 1: Cut the fabric in the shapes you want. I made a pond and a sandy patch.
If you are making a backing (I did, but the fabric is not pictured in the photo below) cut that the exact same shape as the green felt.
Easy DIY dinosaur play mat toy

Step 2:
Sew your pond onto the green felt with a basic zigzag stick. If you are handy with "no sew" glue then you could use that, but I haven't tried it.
Easy DIY dinosaur play mat toy

Then your sandy patch in the same way:
Easy DIY dinosaur play mat toy

Then, place your backing on and zigzag stitch around the whole thing. Mine is pretty imperfect, as you can see. If you want it to be really neat, choose a much closer zigzag stitch. But this does the job, in my opinion.
Easy DIY dinosaur play mat toy

Now you have your mat!
Easy DIY dinosaur play mat toy

Step 3: Make the drawstring bag
Ok, forgive my wrinkled fabric but I couldn't risk waking the baby by getting the iron out of the cupboard by his room ;D

I used 2 scraps of linen type fabric. These were actually samples and are roughly 15cm x 20cm.

Easy DIY dinosaur play mat toy

Place your fabrics together with right sides together. (I.E the fabric pieces are inside out to how you want the finished bag to be).

Sew a straight stitch on 3 sides.
Easy DIY dinosaur play mat toy

Fold down the opening and then fold it again, so the raw edge of the fabric is hidden, then (ideally ;D) iron it flat before sewing right around, leaving a 1-inch gap where your drawstring will go in.
Easy DIY dinosaur play mat toy

Turn it inside out and admire how crafty and talented you are.
Easy DIY dinosaur play mat toy

How cute! Get your drawstring or ribbon, pin it to a safety pin and thread it through, making sure to keep hold of the other end so it doesn't get lost inside.

Easy DIY dinosaur play mat toy


Step 4: Populate your mat!

I used small balls of green plasticine, placed on a circle of card (shown below) as bases for my trees. Pebbles, twigs, and pieces of bark also make a great habitat.

Easy DIY dinosaur play mat toy

Have fun setting it all up. 
I store the plasticine and the small circles of card it a mini plastic sandwich bag inside the kit, so it doesn't stick on things.

Easy DIY dinosaur play mat toy

Easy DIY dinosaur play mat toy

Easy DIY dinosaur play mat toy

isn't it fun?

Easy DIY dinosaur play mat toy

Easy DIY dinosaur play mat toy

Now you can roll it all up...

Easy DIY dinosaur play mat toy

...store it in your handy drawstring bag...

Easy DIY dinosaur play mat toy

...(which is so darn cute)....
Easy DIY dinosaur play mat toy

 .... and gift it to your favourite dino-lover!

Easy DIY dinosaur play mat toy

For more dino-inspired fun, check out our super-simple girl's Dino Party and cake here.

For more handmade toys and gift ideas, check out these posts:
All the things I made
A handmade Christmas 


Easy Girl's Dinosaur Party (& pink dinosaur cake tutorial)


Ella is four!

When I was a kid, half the fun of birthday parties was choosing which cake Mum would make from the Women's Weekly Birthday Cake book (an NZ & Australian classic).  Of course, the key was to choose the cake with the most lollies adoring it. The table would be spread with chips, jelly, cheerios (cocktail sausages) and little bowls of lollies. We'd tie a couple of balloons to the letterbox and guests would arrive for a game of musical statues, pass-the-parcel, and usually a treasure hunt. At the end we'd have party bags for the guests to take home - usually filled with a couple of gimmicky party toys, some lollies, and a slice of leftover cake wrapped up in a soggy paper towel for good measure, with hopefully a few smarties or cadbury pebbles still stuck to the buttercream icing.

Those parties were all about the kids, and they were awesome.

Easy pink dinosaur party and cake DIY

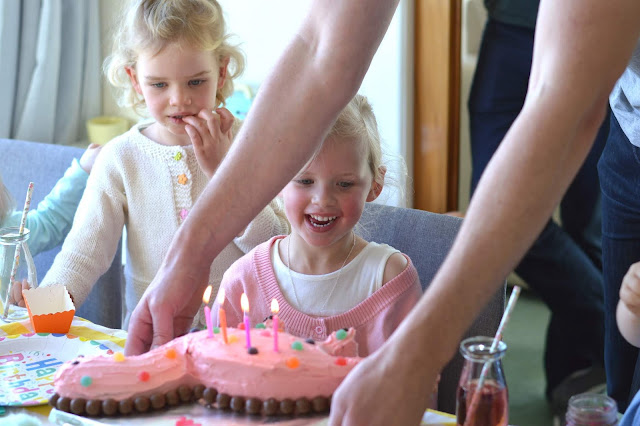
I wanted that for Ella's 4th birthday, along with a few dinosaur themed treats because that's what our girl is into at the moment. She has been talking about her cake and party for months, and after roaming through the options (shark and volcano cakes were the big contenders) she settled on a dinosaur cake. And then she asked it to be pink, since she "only likes pink and yellow". At that particular moment, anyway.

I saved some speckled eggs from Easter thinking they would make great "dino nest" cupcakes. Ella looooves cupcakes and asks to make them all the time, so this was very exciting for her.

Green-blue buttercream, some coloured sugar (bought) and a few eggs were all we needed. The cases are silicone and so much easier to get the cupcake from than paper cases. (The larger eggs are M&M's brand, the smaller ones were something else I've forgotten!).

Easy pink dinosaur party and cake DIY

Chocolate crackles from the Chelsea Winter recipe were so easy to whip up. I melted a block of Cadbury Energy chocolate (200g) with 25g butter, and stirred 3 cups of rice bubbles into it before diving up the mixture and leaving to set. Done!

Easy pink dinosaur party and cake DIY

The jellies were my modern-day take on the jelly-oranges we used to have as kids. For this I set 2 colours of jelly into the jar, leaving about 2 hours between each layer, and popping in one Natural Confectionary Company gummy dinosaur to each layer. We called it dinosaur slime. I think using all green or all blue jelly instead of the 2 different layers would have been great too.

Easy pink dinosaur party and cake DIY

Easy pink dinosaur party and cake DIY

Easy pink dinosaur party and cake DIY

It's somehow become a tradition for me to draw a new chalkboard sign for each big event. This one was simple but fun:
Easy pink dinosaur party and cake DIY

I made up my own dinosaur cake pattern as there was nothing I could find that was quite what we wanted. I figured out how to make it from just ONE round cake tin - so it's pretty simple. For a basic guide to how I made this shape from just one round cake tin, see the bottom of this post.

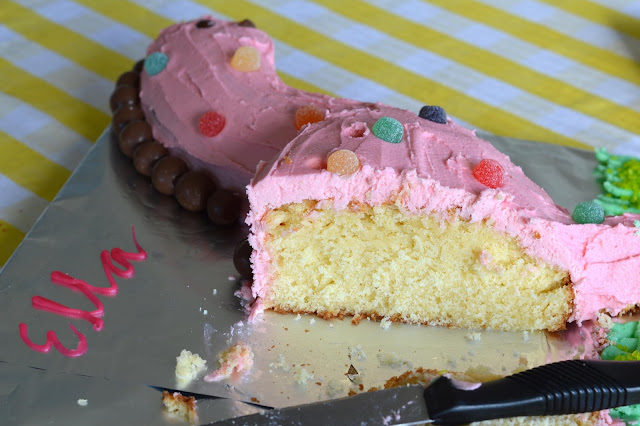
The icing is just plain pink buttercream, and the cake base is from the Chelsea Sugar website called "birthday cake". It was simple to make and perfect for a birthday cake. Not dry, but firm enough for easy carving. I love classic vanilla birthday cake with buttercream.

Easy pink dinosaur party and cake DIY

I didn't let her see it until we sang happy birthday, and she loved it.

Easy pink dinosaur party and cake DIY

Yum!

Easy pink dinosaur party and cake DIY

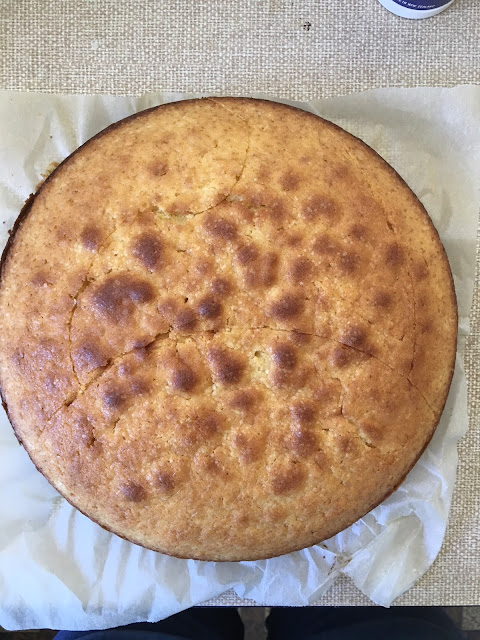
To make the diplodocus / longneck / brachiosaurus or whatever you want to translate this dinosaur as, you need a large round cake tin (mine is 26cm) and a vanilla cake recipe that's large enough. I used this recipe, pouring it all into the one tin (instead of 2 like in the recipe) and it fit perfectly. 

If you look closely on the cake below, you can see the where I've scored it with my knife BEFORE cutting. There is an oval body at the bottom of the circle, a neck and head piece coming up the left hand side, and a tail (hard to see) curving up the right hand side of the circle. Got it?

Easy pink dinosaur party and cake DIY

Once cut, you move the neck piece to the right side, and the tail piece to the left side. you WILL need to cut the base of the neck and tail on a different angle to get it to sit right, and fit on your board. (This is just a chopping board covered in foil.)

I haven't included the legs in the image above, but from the part of the cake that's left you can cut two little legs. 
Use a sharp, long knife to carve any bits that you want to curve. In my case, one side of the head/neck needed to be carved to be lower.
Easy pink dinosaur party and cake DIY

Ice with a thinner coat first to coat to seal in the crumbs. Then go over again with thicker icing. This looks flesh toned in the evening lighting, but it's a bubblegum pink.
Easy pink dinosaur party and cake DIY

I put Maltesers all along it's back to make "spikes" and use mini M&M's for the eyes, and a broken malteser for the mouth. The spots are Jellytots, and the grass uses the leftover icing from the cupcakes, with some green coloured sugar crystals on top for good measure. I also put a few mini M&M's on as toenails. The name Ella was easy to do straight onto the foil with an icing pen from the supermarket.

Easy pink dinosaur party and cake DIY

I wanted the head/face to be large and cartoonish, but you could go for a more realistic look with a much smaller head and thinner neck.

Easy pink dinosaur party and cake DIY

I hope this inspires someone to make a simple DIY dino party for a special kid! My daughter loved it.


Mother's Day + a word of encouragement


Hey fellow mums. 
How's your Mother's Day going? Ours has been eventful with a morning in the accident & emergency clinic with a very sick little boy, and an afternoon of sitting in the rocking chair in his nursery with him dozing on me. Josh has been totally out of it and concerningly dopey today, but tonight he *thank God* bounced back and is *hopefully* asleep in bed right now. I'll be honest, I loved having him sleep on me. Even if it came at the price of 4 loads of spew-laundry that got all over me and many other things.

I just wanted to quickly share this precious verse I came across this week on a insta-friends feed. I never paid much attention to this one before, but it's a reminder of this promise to us mums of little ones, and a reminder that we can be gentle on ourselves too. I tried to make this a PDF that could be downloaded and printed but blogger is throwing me off so... here's a jpeg. #itried.
I hope this encourages someone out there!

Happy Mother's Day.


Baby essentials

NZ Baby Essentials 2018: feat. Babu, Woolbabe, Nature Baby

I love baby things and I get a kick out of keeping our baby stuff organised and in check.
It's taken me a while to figure out what we really use and what the best systems are for us. Everyone has their own idea of the real essentials, but I wanted to show you what I consider my essentials and things that I have used and loved through 2 babies. I still consider Josh a baby and we still use most of these things :)
There are also a couple of things I didn't get but wish I had, so I've included them here. So without further ado.... here are my personal faves:


We got 2 of these for Josh when they were on sale and they're great. They hold up well after washing and come in 2 colours (grey and white). We've given both our kids a 'cuddly' to create a sleep association and it seems to have worked well for us. The minute I give Josh his bunny he snuggles into my neck and relaxes. 

Socks are so practical for little feet as they stay on, and merino is the perfect warm layer that doesn't make the feet clammy. These ones look from Nature Baby look cute.

We didn't have these because they were too expensive, but I always saw others babies wearing them and thought they would make the perfect warm footwear for a winter baby, especially when you're out and about. They look SO snuggly and well made.

We were given some of these as a gift (and my MIL also sewed some wraps for us) and they were so useful. Particularly with my summer baby. I still use Josh's all the time for covering his buggy while he sleeps or as a nice lightweight blanket/sun protector on long car trips. They are so soft and cosy.

Merino bodysuits and pants were pretty much all Josh wore as a newborn and they are still handy now. We got ours at Farmers whenever they had a sale, but you can get them at so many places depending how much you are willing to spend.

We love our Woolbabe sleeping bags. After hearing awful stories in the media about babies getting blankets caught around their necks, I find it's just peace of mind to have a sleeping bag. And of course the more obvious reason that they can't kick them off and get cold! We go for the front-zip ones - I had a side-zip one with Ella but it was less practical. A friend gifted me this Tide coloured duvet sleepbag (so generous) and it's perfect for winter.

I love supporting NZ mum businesses and this one makes really cute dribble bibs. My kids seem to start excessively dribbling from 2 months old so these are so handy to prevent the every-2-hours outfit change when they have drenched their top and got cold!

I am only just realising the benefits of these. When your baby has a cough it's so helpful to turn this on and let some of the mist (not steam because it's not hot) into the room to ease congestion. I bought this one because you have the option to put essential oils in it and diffuse them. Obviously you must research about safety of essential oils with babies, but a drop of lavender oil in a ventilated room can help aid sleep.

I'm a fan of this NZ company because we use their 'De-Stuff' remedies for colds for both us and the kids. This baby balm is all natural and would make a good gift. (For everyday nappy changing, I just use "Castor Oil plus Zinc" barrier cream from the supermarket.)

The oil of sleep! I actually use this for myself and have been sleeping amazingly. 

It has to be gentle, natural and fragrance free for me to use it on my babies. I don't think new babies necessarily need soap - but Josh has a head of hair that he rubs food in so it's very handy now ;)

We had a really hard run of feeding issues with both kids and I ended up having to bottle feed both my babies. We landed on Dr Brown's both times as the best, and now I see they also have a glass version. The more I read about plastic and what it does, the more the glass version appeals to me. We currently have plastic, but if I could go back in time I think I would have got this to start with.

It looks good in the nursery, it's soft, and we'll probably have it for years. This is my fave baby + toddler brush.

Ok so, what are YOUR essentials? 
Which of these would you NOT use?
I love hearing what works for different people! 

I would have to add in the SillyBillyz elasticated bibs with long sleeves from Moore Wilson's  - the only bib that actually keeps their top clean when eating.
AND, Fess "Little Noses" spray. This is often the only relief you can a small baby when they are sick and it works a treat.


Handmade goodies from Happyful

Happyful NZ peg dolls


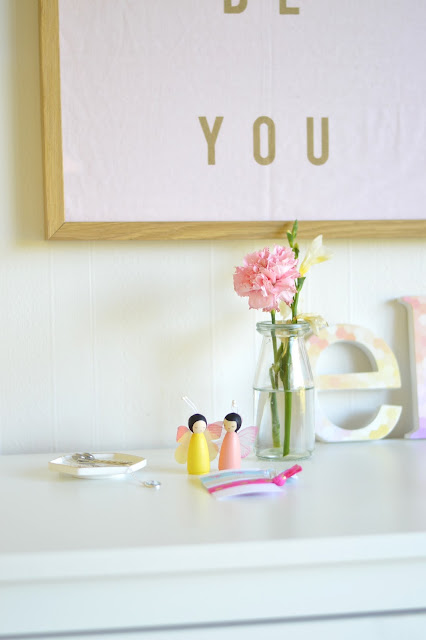
We recently received the oh-so-cute goodies you see above from New Zealand (Wellington!) mum business Happyful NZ. I love finding mum-trepeneurs to support!

If you want some Happyful goodness too, you can use the special discount code BEHAPPY20 for 20% off... especially for readers of this blog. Thanks Viv!

Happyful NZ peg dolls

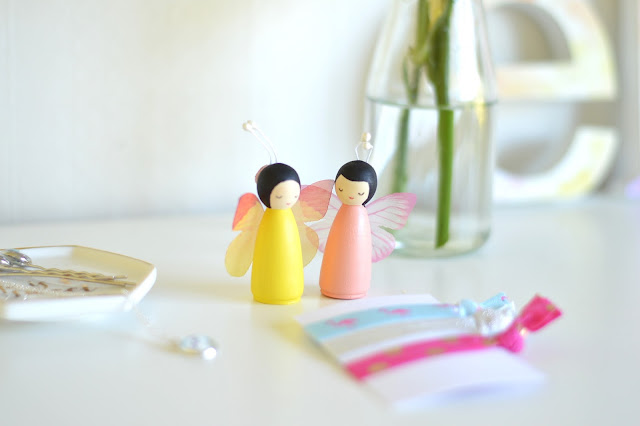
We got the sweet little butterfly peg dolls, some hairties that I'm going to steal, butterfly hairclips and a panda necklace that is so dainty and perfect for an almost-4-yr old! 

Happyful NZ peg dolls

To wear over her grubby sweatshirt, of course ;)
Happyful NZ necklace

Aren't they sweet?
Happyful NZ peg dolls


And the packaging is pretty too, if you want it for a gift.


Thanks Viv! Check out other Happyful products here - they also have charming art prints from Michelle Stanich, keyrings, and more peg dolls sets & jewellery. Don't forget the discount! (Code BEHAPPY20)